Using Talend to Extract Data from an AWS S3 Bucket to Postgres
Today we will be using Talend to extract data from an AWS S3 bucket environment and load it as a new table in PostgreSQL.
I have approximately five years of ETL and Database experiences, and as of a few weeks ago, I never used Talend, AWS, or Postgres. Through a series of videos on Pluralsight and Talend’s curriculum, I was able to navigate this challenge in a matter of hours.
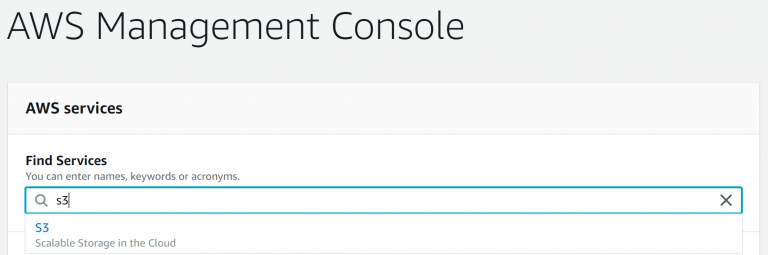
The first step is to find your AWS S3 connection and file paths. After you have logged into AWS, type in “S3” in the “Find Services” section of the management console and click “S3 Scalable Storage in Cloud”. You will find all your buckets that house your files and data sets. For this blog, I am working with a bucket labeled “Covid19”. Inside this bucket are two folders labeled “Confirmed” and “Deaths” that are separated into the US and Global numbers of the Covid19 pandemic. We will only be working with the “Confirmed” folder and “Global” file for this blog.
With our files in hand, lets open Talend and create a new job design.
For extracting the data, we will be using the “tS3Connection”. This will establish the AWS connection so we can gather our files. All you must do for this connection to be successful is to provide the “Access Key” and “Secret Key” provided by your AWS admin and embed them in double-quotes. No other settings need to be changed.
The next component is needed to locate the bucket and file in our connection. The name of that component is “tS3Get”. Before we get into the settings, you need to link the tS3Connection component with the tS3Get by right-clicking the connection, going to trigger, and selecting “OnSubJobOk”. Then you will take the line and click tS3Get. This will tell Talend once the connection is successful to move to the next step of the job flow. In the settings, you will check the “Use an existing connection” box and select the connection you created in the last step. Then in the “Bucket” box, you supply the file path, in this case, “nuwave-covid19/Confirmed”. The “key” box is the name of the file that is present in the folder, “ts_conf_global.csv”. Lastly, you supply the target destination. The file is to be downloaded at “C:/Users/jv/Documents /TS_CONF_GLOBAL.csv.” Then you run the job in the “Run” tab.
Once our file is downloaded, we will use it as our Metadata schema.
- Navigate to the “Metadata” section
- Tight click the “File Delimited”
- Select “Create File Delimited”.
- Name the metadata “TS_CONF_GLOBAL”.
- Browse for the file and confirm the Format is “UNIX”.
- In the “File Settings” navigate to “Field Separator” and select “Comma” in the dropdown.
- Under the “Rows To Skip” select the header box.
- In the “Preview” pan check the “Set heading row as column names”
- Select “Refresh.
- After the preview is loaded click next.
The final step of the metadata is confirming the data structure of each column. I have found Talend’s guesses to sometimes be off, so to be safe let’s change the “Type”,” Province_State”, and” Country_Region” to a length of 100, and make sure to change the Schema name to TS_Conf
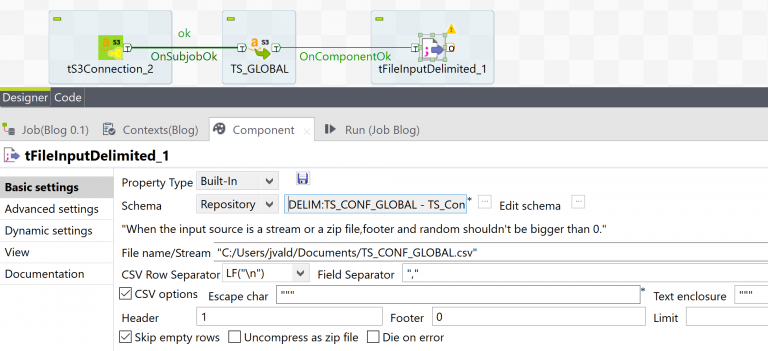
The next component is the “tFileInputDelimited”. This will read the file you downloaded based on the schema you previously set up. First, you need to connect the tSGet to the tFileInput. Right-click the tSGet, going to trigger, and selecting “On Component Ok”, followed by placing the connection on the new tFileInputDelimited component.
In the tFileInputDelimited settings you will:
- Go to the “Schema” drop-down and select “Repository”.
- Select the “…” next “Schema”.
- Navigate to the “File Delimited” section and keep clicking the down arrow until you see “TS_Conf”.
- This tells Talend the structure of the file.
- In the “File name/Stream” provide the path and filename of your downloaded file.
- Replace the semicolon with a comma in the “Field Separator”.
- Select “CSV Options” and make sure the “Header” box has the number 1 in it.
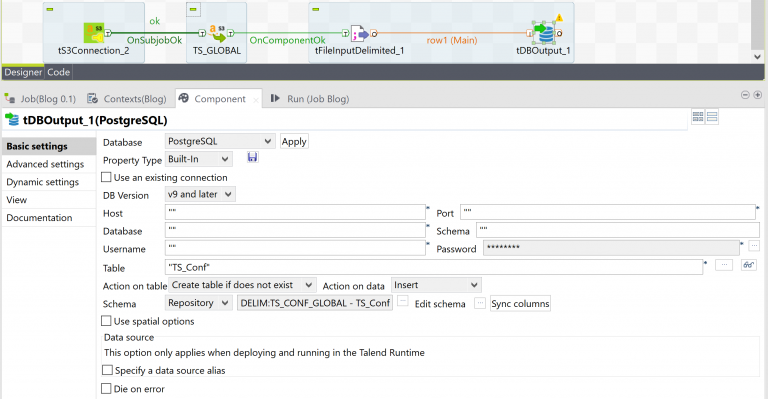
For the next step, we will now connect to Postgres and load our file. The database component we are using is “tDBouput”. After it is selected, we need to connect it to our tFileInput. Right-click tFileInput and select “Row” followed by “Main” and select the new tDBOutput. In the settings of the tDBOuput under database, select “PostgreSQL” and click apply. Provide all the connection information as provided by your DBA. You will then select “Repository” in the “Schema” box and choose the “TS_Conf” schema. Notice how the Table changed to match the name of the file. Since you are using this file to create a new table, make sure to change the “Action on table” box to “Create table if it does not exist” and confirm the “Action on data” is set to “Insert”. If you have a warning symbol in the tDBOuptut component referencing the schema, click the “Sync columns” button near the bottom of the settings box.
The final step and most important step is running the completed job. When it finishes, you should see a new table in the Postgres database labeled “TS_Conf” with 264 rows.

