iTunes Library Cleanup: XML and String Distances in KNIME
I have been a full-time telecommuter over 18 years so when I am not on a conference call, I am usually listening to music while I work. Over this span of my career I have accumulated a large music library which I manage in iTunes and stream to various devices around my house. As my collection has grown, I’ve tried to be organized and diligent about keeping the meta-data of my music cleaned up. But it has inevitably gotten a messy over time, particularly since my children have hit their teenage years and started to add their own music to our family’s collection.
So, as I contemplated my next blog posting, I decided to use the power of the open source KNIME data science platform to start cleaning up the meta-data of my iTunes library. Specifically, for this article I decided to see if I could clean up the artist names for all of the tracks in my library. Fortunately, iTunes provides the ability to export your library’s meta-data as an XML file, so it is easy to analyze your music’s meta-data without having to dig into iTunes’ internal database.
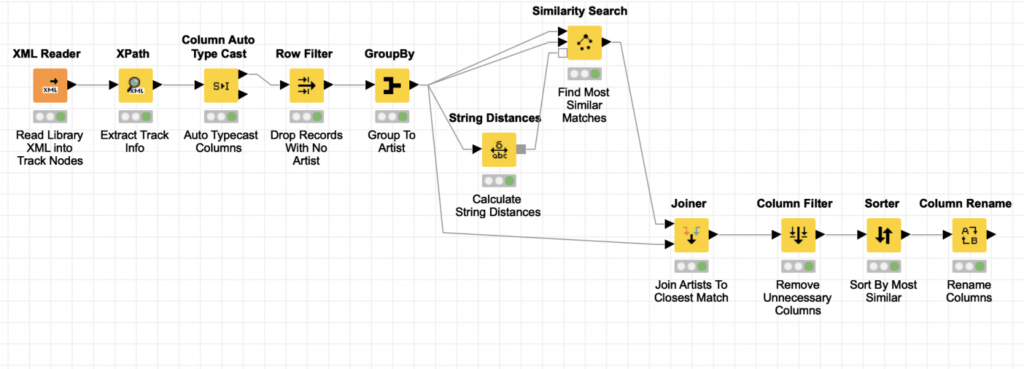
Thanks to the power of KNIME, this can be done with a small workflow. But it is a small workflow that leverages some subtle techniques to deal with both the immense size of my library’s XML file and the unusual node structure Apple uses inside of it. Furthermore, it uses KNIME’s powerful string distance features to do more than just detect close misspellings; it can identify when lists of multiple names are the same except for the ordering of the names (and even when there may be misspellings in some of those names in the list). The workflow I developed is shown above and it can be downloaded here. You will have to provide your own iTunes XML file to test with (or find one online).
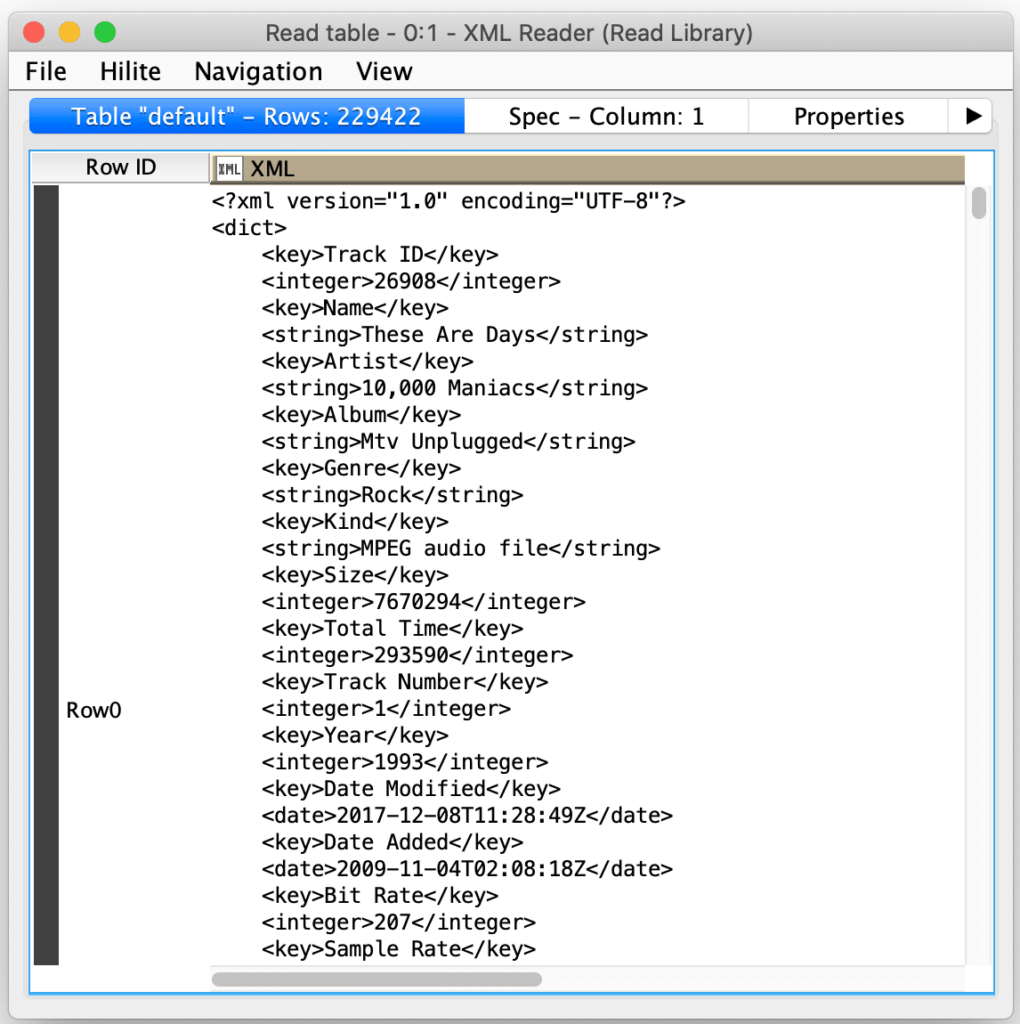
Obviously, the first step in the workflow is to read the library XML file. One cool feature of KNIME is that the workflow editor supports drag and drop for source files. If you drag a file onto the editor, KNIME will do its best to create the appropriate reader configured with the file as its source (the file continues to live in the location it was dragged from and reader just points to it). Having done this, I tried executing the XML Reader node and encountered my first challenge: my library’s XML file was over 360 MB and the default configuration of the node tries to load the entire XML into an in-memory document object model (DOM) which led to an out of heap space error in my KNIME workbench.
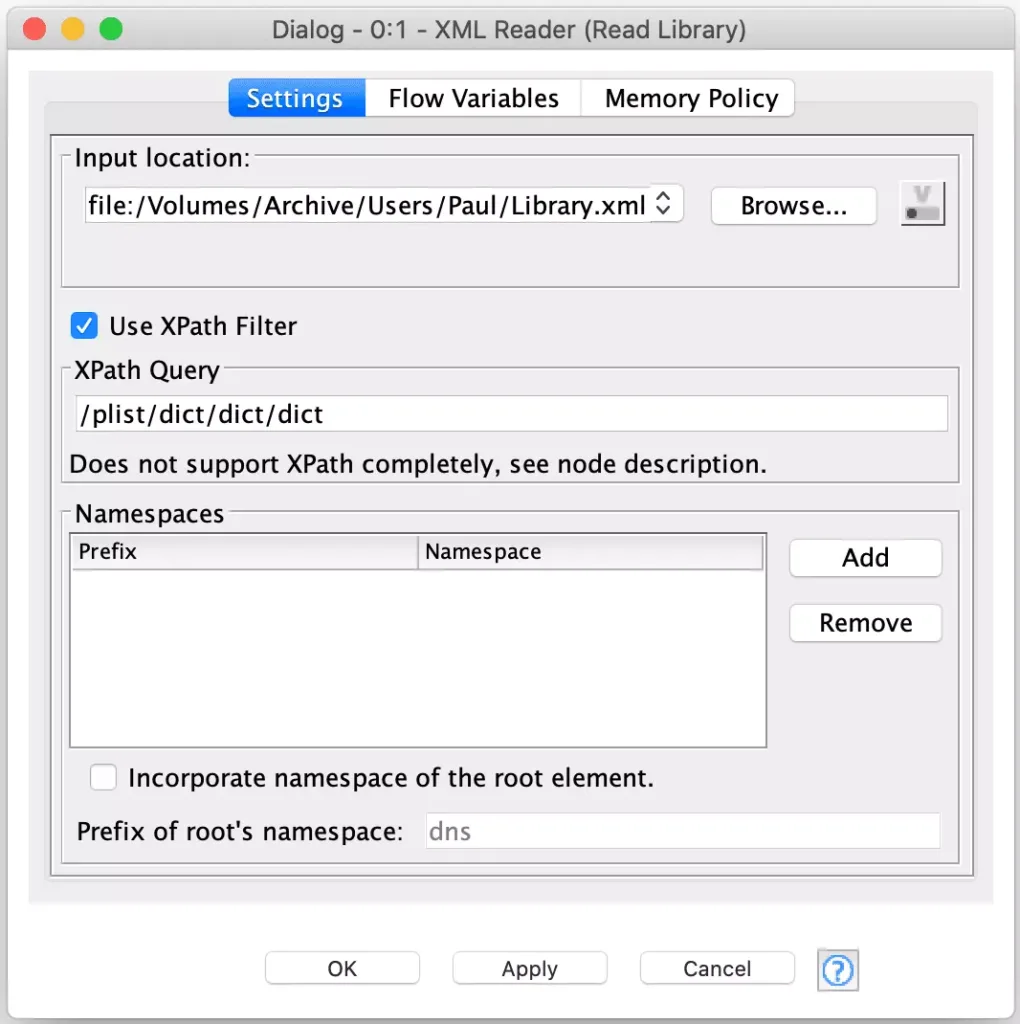
Rather than try to increase the memory of my workbench, I decided to leverage an advanced feature of the XML Reader node to configure it with a XPath expression the node can use to detect individual record nodes. In this case, the node only supports absolute XPath expressions to that they can be applied as the XML is streamed in (e.g. the entire DOM does not need to be loaded). Each time the expression matches it will output a record as a row containing the node that matched (including all of its children). Fortunately, the iTunes XML is structured in way that can be processed using this technique. By configuring an XPath to match each track’s parent node, each track’s XML is output in a separate row with only minimal memory usage during execution:
Now that we have each track’s XML in its own record, we need to decompose it into its individual attributes. But here is where we see Apple’s strange choice for the structure of the XML it uses. Rather than use named elements where the contents of the element are the value for the attribute, they opted for a pattern where they have an explicit key element immediately followed by a value element with the name of the value element indicating its value type. Fortunately, KNIME provides an XPath node with full support for the most advanced functions and I used to be an XPath ninja in my distant youth:
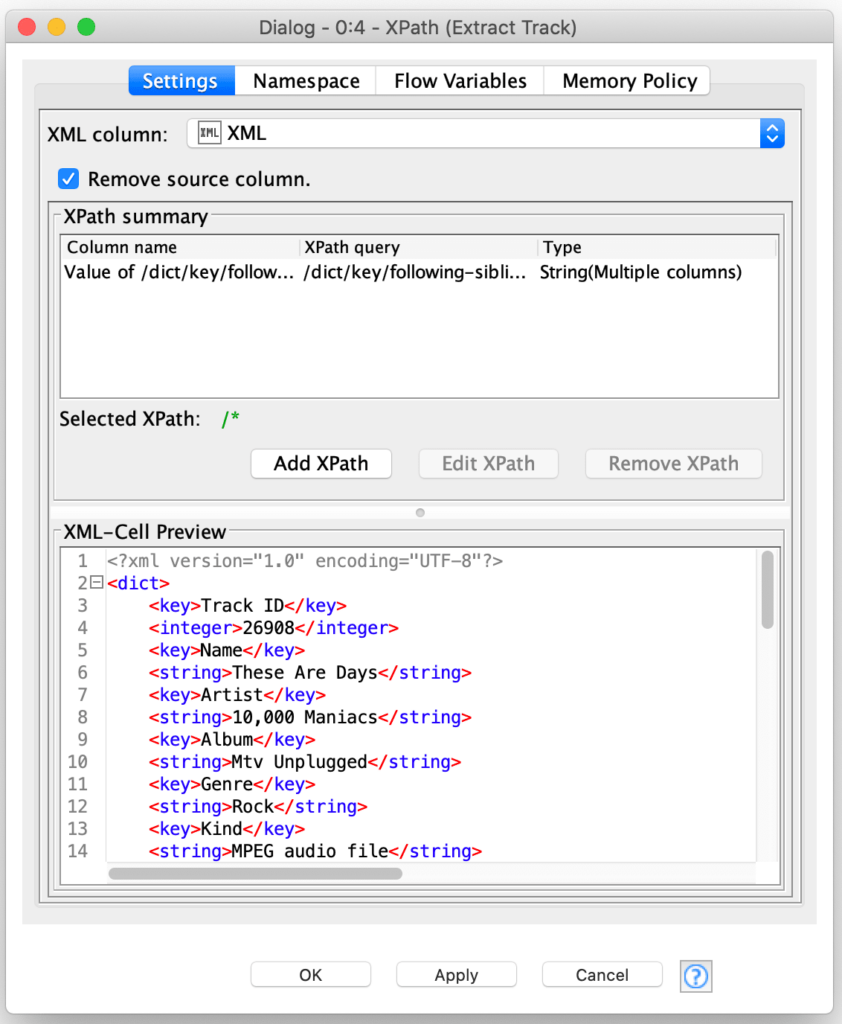
The key here is that the XPath node allows you to specify a path for not just the value of a column but also for the column’s name. Furthermore, the column name is specified as a relative expression to the value node so that the node supports generating an arbitrary set of columns from all value matches for a given record:
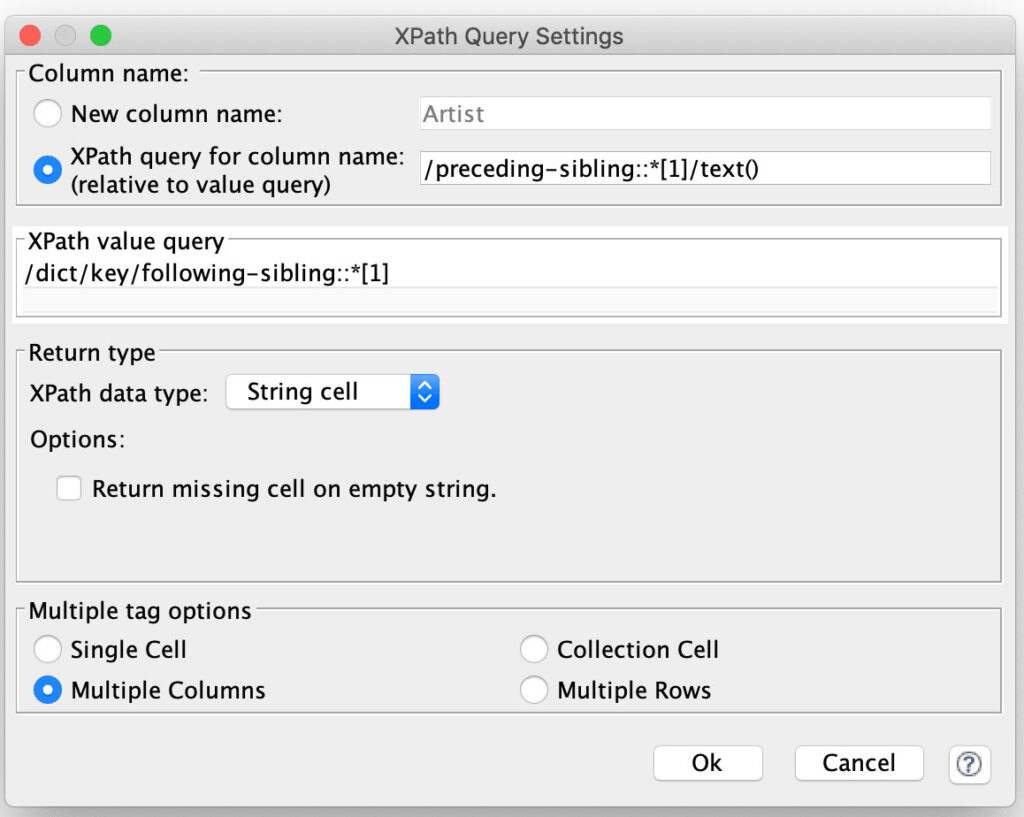
The XPath node is configured with a single column expression that considers every element that follows a <key> element to be a value. For each value’s column name, it then navigates to the preceding <key> node and extracts its text. Another subtle technique is that by setting the return type for the value to String, the node will automatically return the text of each matched value node. And the final piece of configuration is selecting the Multiple Columns option to tell the reader to process each value into its own column.
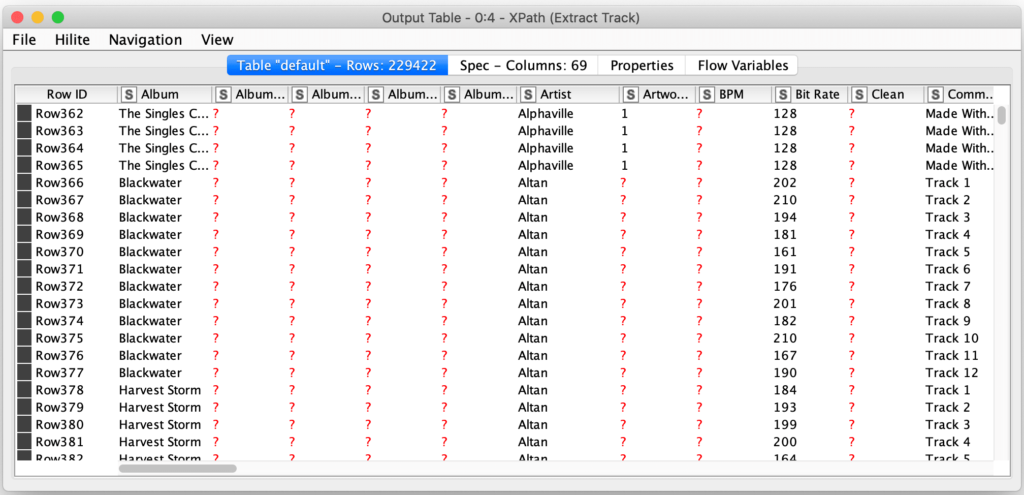
I cannot over-emphasize how powerful this technique can be for dealing with arbitrary XML with possibly varying structure between records. With that simple single column XPath configuration, the node is able to parse every attribute in every track’s XML into its appropriate column:
However, in order to apply this technique, it was necessary to treat all the values as strings, so the next step is to leverage another extremely powerful node: KNIME’s Auto Type Cast node. This node will scan the values of each column in an attempt to determine which value type best fits the values in it. It will then convert each columns’ values to the most appropriate type it was able to determine for the column.
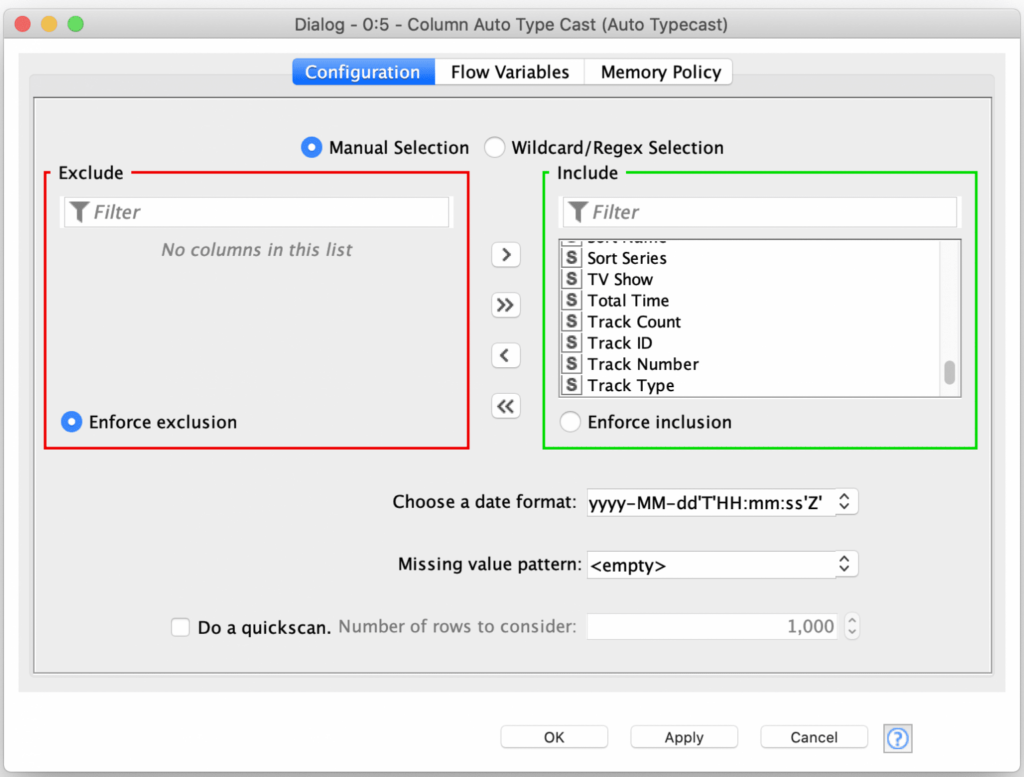
This node even supports the configuration of date format that it can use to detect formatted date fields. Since Apple used the same formats for all date strings, we can use that option to convert these fields as well. If this was not the case, we could tell the Auto Type Cast node to ignore the date fields and then use the Date Parsing node to process them individually.
Now that we have all the fields extracted and with their proper value types it is time to start the actual Artist name value analysis. This starts with dropping any records that do not have an Artist name, but you could also split the records into two sets if you wanted to produce a report of all tracks that are missing an artist attribute. For the simplicity of the blog posting, I’m just ignoring any tracks that do not have an artist attribute.
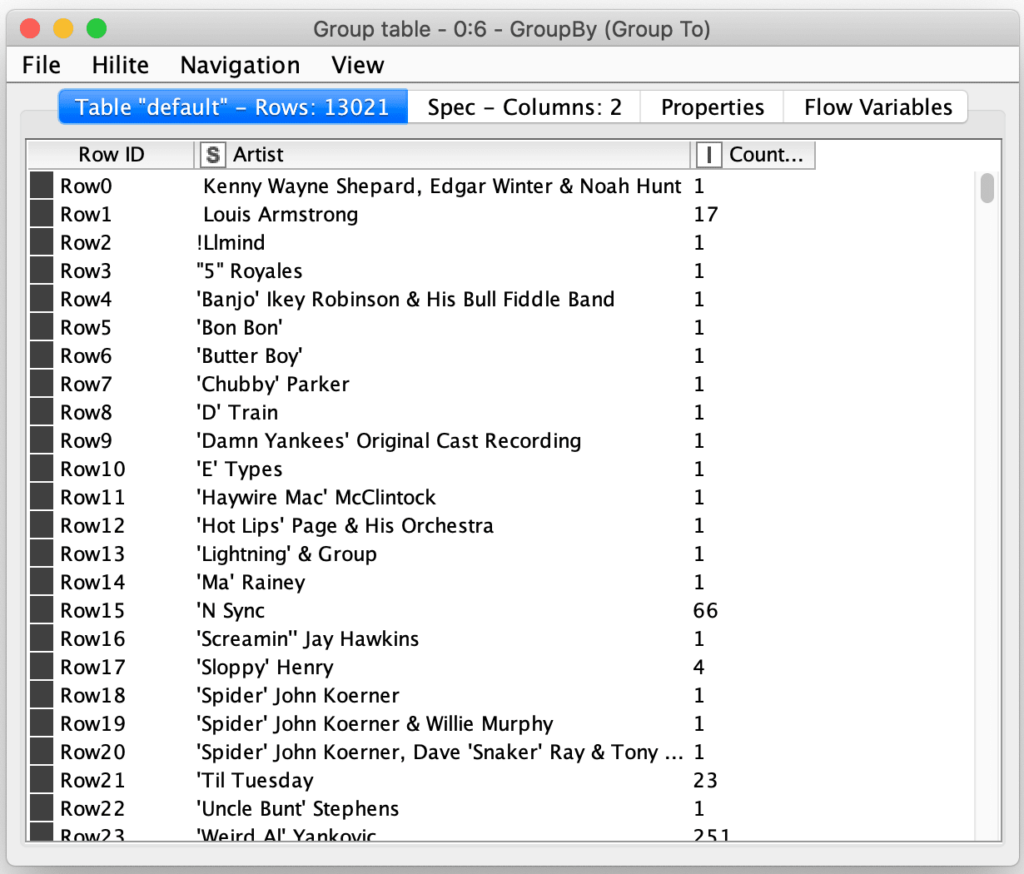
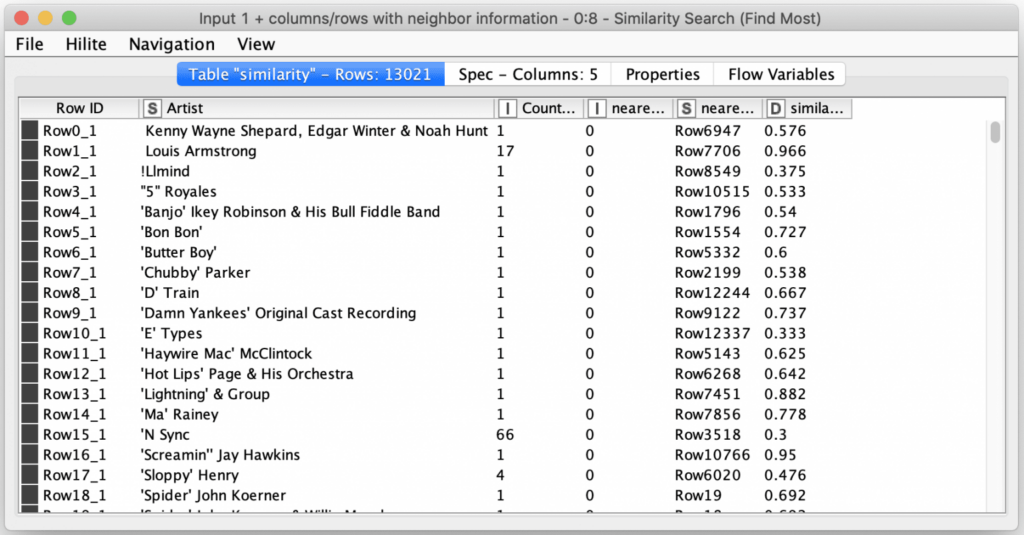
Once we have all records with an artist attribute, we then use a grouping node to group on the artist name and count the number of records with each name. This will produce a result table with all unique artist names and their track counts. From this, I can see that my music collection currently has 13,021 unique artist names in it.
Now that we have a list of unique names, it is time to leverage the String Distance node to compare all of the names.
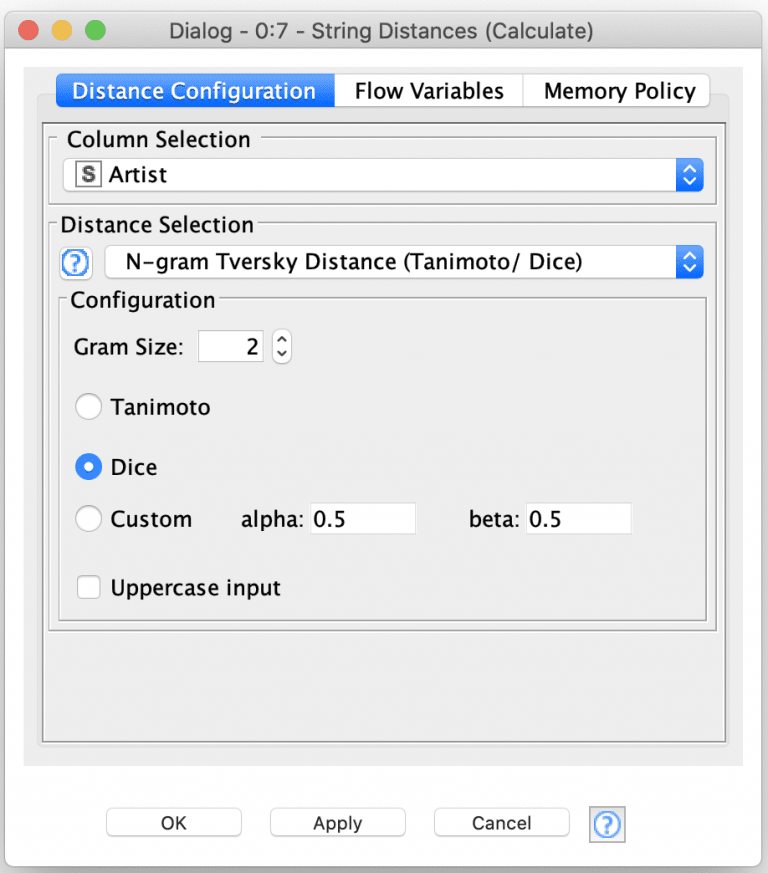
Here we have configured the node to use the Artist field and use the N-gram Tversky Distance function to measure string distances. This is a more sophisticated function than just a simple edit distance measurement and it allows us to detect issues with name ordering and not just simple misspellings. The output of this node is a model that contains a matrix of distance measurements between each Artist name and all of the other names. The distance measurements range from 0.0 (identical) to 1.0 (not at all similar).
Next we can use the Similarity Search node to apply the distance matrix to select the most similar artist for each artist in our list:
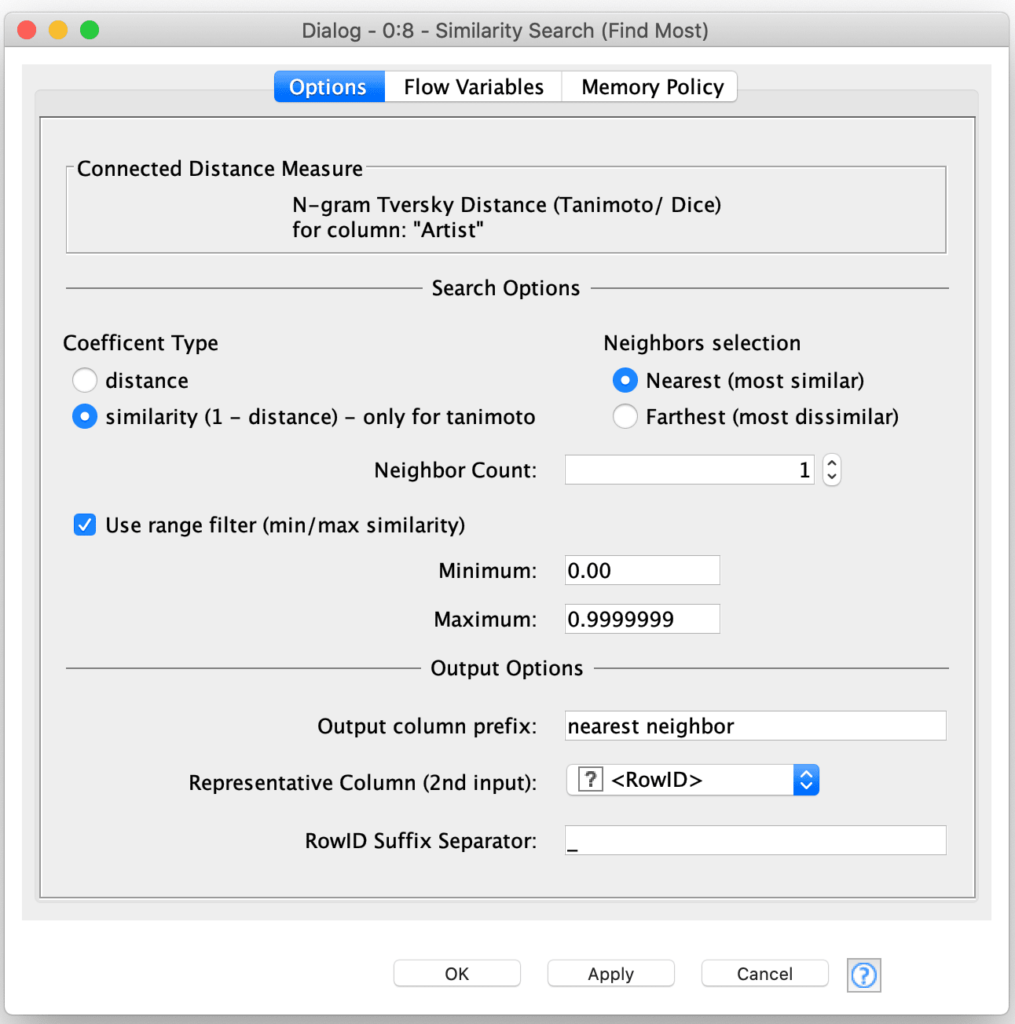
The key here is to use the range filter option to configure the node to ignore any identical matches by setting the maximum range to value just under 1.0 while also using the similarity coefficient type to invert the distance measurement If we left the range maximum at 1.0, each Artist would match with itself since equal values are the “most similar”. The output from this node is a table with a column that contains the row identifier for the artist with a name most similar (but different) for the current row’s artist name:
The last steps are to then join the output table containing the similar row identifiers back to the original table and clean up the column names and ordering. The final results of the workflow is a table of potential Artist name issues ordered from the names most likely to be variations of each other to the names least likely to variations of each other.
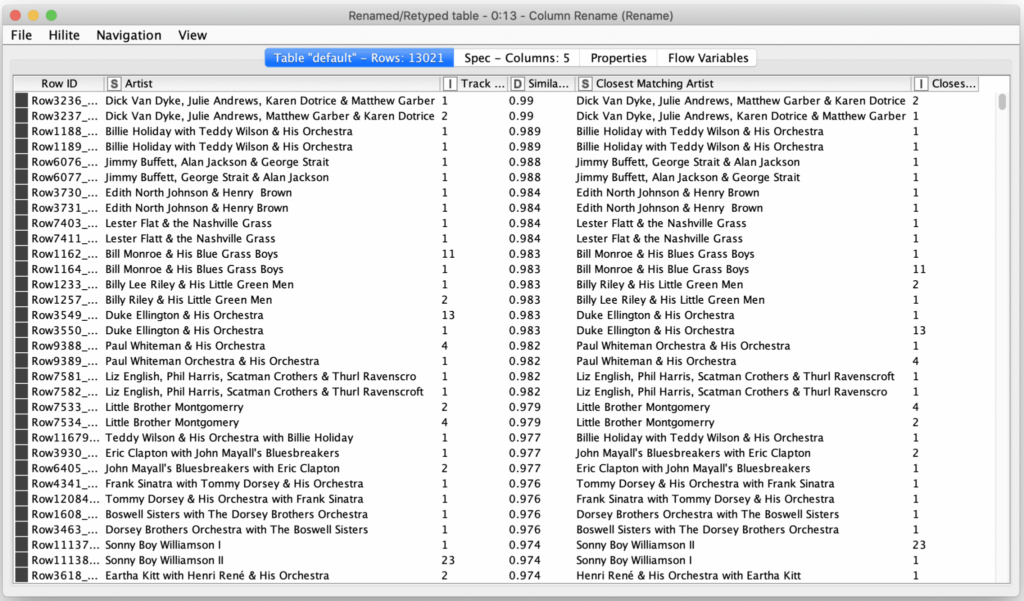
The table above shows the most likely Artist name issues in my iTunes library. Many of them are for the same artist names, just ordered differently in variation tracks. Other ones are for misspellings in the names. And there are a small handful where it looks like the name is the same but when I investigated these, I discovered it was because of additional whitespace in the Artist name attribute of a track. It is also interesting to note that the results are often clustered in pairs of rows because the scoring between variations in each direction is often the same. This is not always the case so there will be an occasional row separated from the row containing the distance measurement in the other direction.
I can now use these results to manually cleanup my iTunes library using my judgement for which is the correct variation of a name. If I were to automate this process, I would want to do further analysis to determine the threshold for determining how similar items need to be in order to be automatically corrected. I would also need to come up with a manner for selecting the “correct” variation of an Artist name such as using the name that has a higher count of track already in my library or using a master reference list of Artist names.
As you can see, the string distance nodes are very powerful ways to clean up potentially noisy data and disambiguate names with spelling and ordering variations (and sometimes both at the same time). In this case, we were just working inside the dataset, but we could also use the string distance nodes to evaluate incoming data against a master list of values (e.g. to check customer names against a reference list of known customers). And all of this was done with less than a dozen processing nodes thanks to the power of KNIME!
Finally, the initial part of this workflow is the XML processing necessary to read all of the track data from an iTunes library so you could certainly do much more analysis of your library. This includes looking for issues with other string fields as well as generating reports and statistics based on the other track meta-data (e.g. look for the highest bitrate version of duplicate tracks). With a little more XML and XPATH wizardry, you could also process other sections of the Library XML to look at playlists, videos, and podcasts.
